How to install an IPA directly on iOS devices: A guide
If you're a developer or IT admin, you can install an IPA file on an iOS device by using three methods: Xcode's drag-and-drop functionality, hosting it for over-the-air (OTA) installation, or using Apple Configurator. Your Apple Developer account type determines your options, but all three methods require proper provisioning profiles and code signing. Read more to learn about each method in detail.
If you’re a developer testing an app build, or a mobile administrator working with custom business apps, you’ve likely encountered the need to install an iOS app in the form of an IPA file directly on your iPhone or iPad.
In this article, we’ll walk through several methods to install an IPA on an iOS device, as well as explaining how your Apple Developer account type affects what you can and can’t do when it comes to IPAs.
Enter any URL to build your iOS app
Understanding IPA files and eligibility requirements
What is an IPA file?
Although usually simply referred to as an “IPA,” the term is in fact an acronym for “iOS App Package.” It’s essentially the packaged version of an iOS app, similar to an APK on Android.
To install an IPA on your device, it must include a valid provisioning profile and be signed with a valid signing certificate. This is where Apple’s developer programs come in.
Apple Developer account types:
Personal account using an Apple ID:
Apps can only be provisioned automatically using Xcode.
Typically apps are installed directly from Xcode after the build process but the IPA can be extracted from the build folder and installed using the methods detailed below.
Individual or organizational Developer Account:
Apps can be provisioned via the Apple Developer portal or automatically in Xcode.
IPA files can be installed on iOS devices with UUIDs listed in the provisioning profile, as configured in the Apple Developer portal.
Enterprise Developer Account:
Apps can be provisioned via the Apple Developer portal or automatically in Xcode.
IPA files can be installed on any managed device without registering the UUID.
Want to know how it all works?
Get hands-on with Median’s comprehensive documentation, and build your app with ease.
Method 1: Using Xcode and drag-and-drop installation
Who is this for?
This is ideal for developers who have access to Xcode, a Mac, and the app’s source code or a correctly signed IPA.
How it works:
1. Obtain the IPA and provisioning profiles: Ensure your IPA is built using a provisioning profile that includes your device’s UDID.
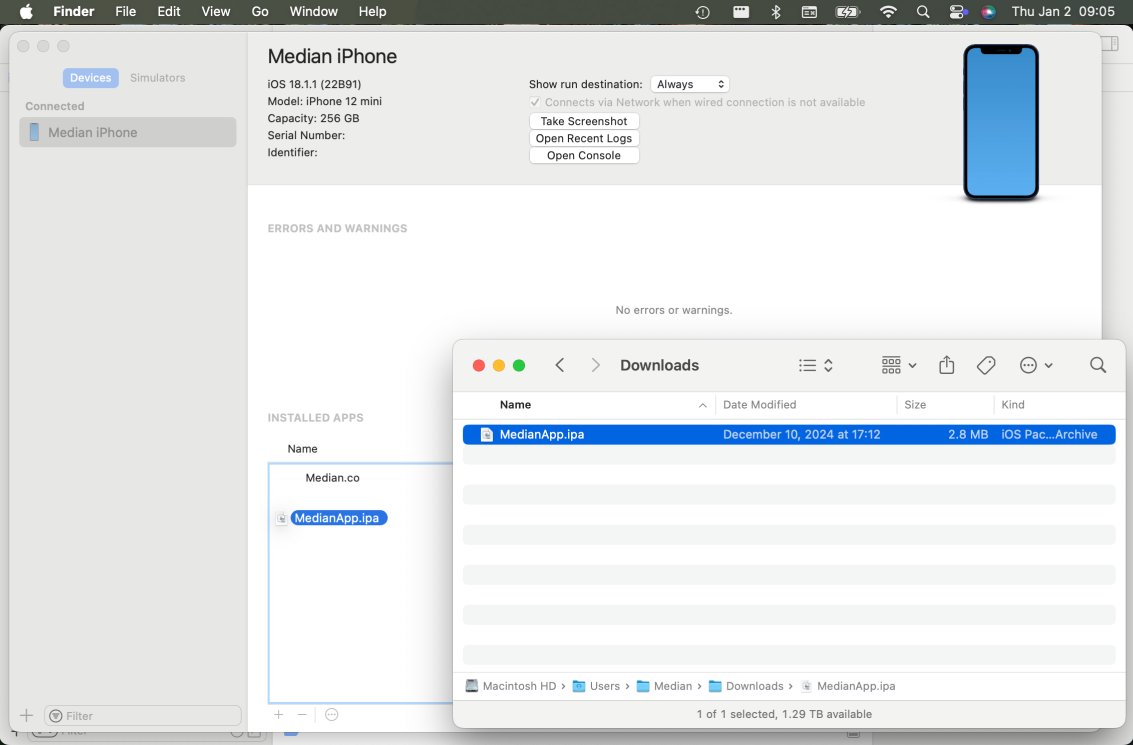
2. Connect your device to your Mac: Use a USB cable to connect your iPhone or iPad. Launch Xcode, open Window > Devices and Simulators.
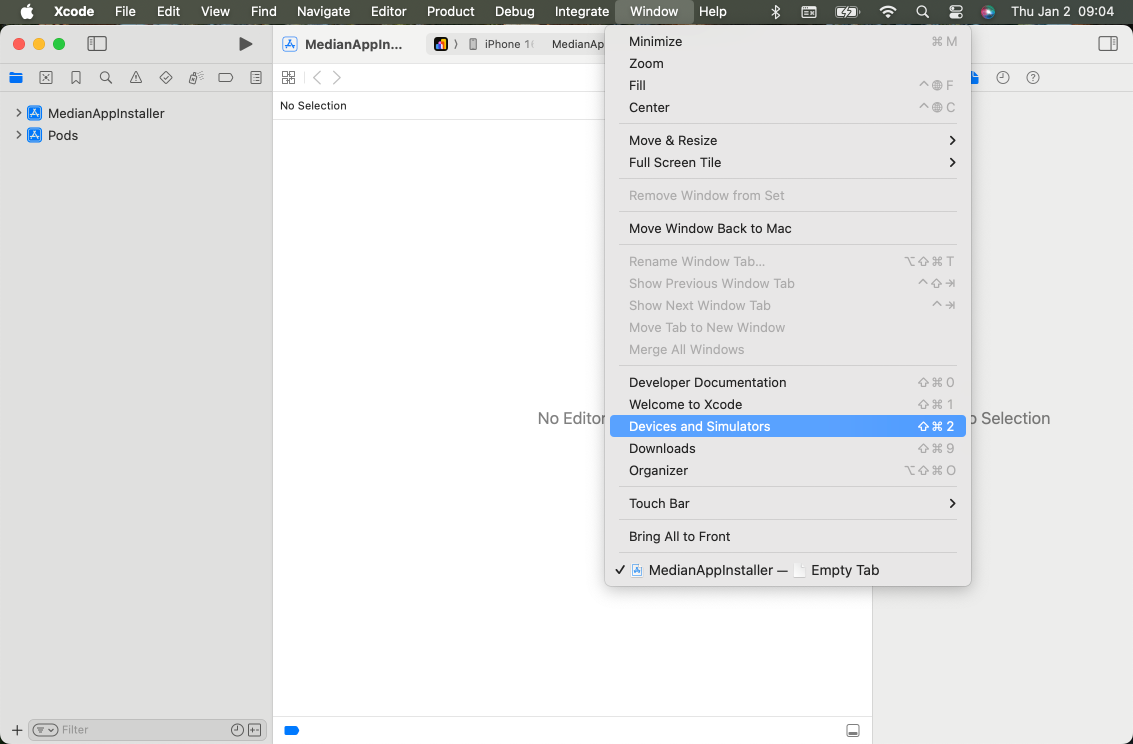
3. Drag and drop the IPA: Once your device appears in Xcode’s Devices window, simply drag and drop the IPA file from the Finder onto the “Installed Apps” section. Xcode will install and verify the app.
Pros of using Xcode and drag-and-drop installation:
Straightforward process.
Ideal for ongoing development and testing.
No need for separate deployment services.
Cons of using Xcode and drag-and-drop installation:
Requires a Mac and Xcode.
Method 2: Over the Air (OTA) installation using a manifest file
Who is this for?
Useful for both ad hoc distributions (if you have a standard developer account and device UDIDs) and enterprise distributions.
How it works:
1. Create a manifest file: You’ll need to create an XML “manifest.plist” file that points to the IPA’s location and includes metadata like bundle identifier, version, and title. For example:
2. Create an app install webpage: On a new or existing webpage, create an “Install App” link using a custom itms-services URL scheme that points to the manifest file. For example:
Source: Median.co
3. Host the webpage, IPA, and manifest: You’ll need to host the app install webpage, IPA file, and manifest.plist file on a server that’s accessible by the devices that will be installing the IPA.
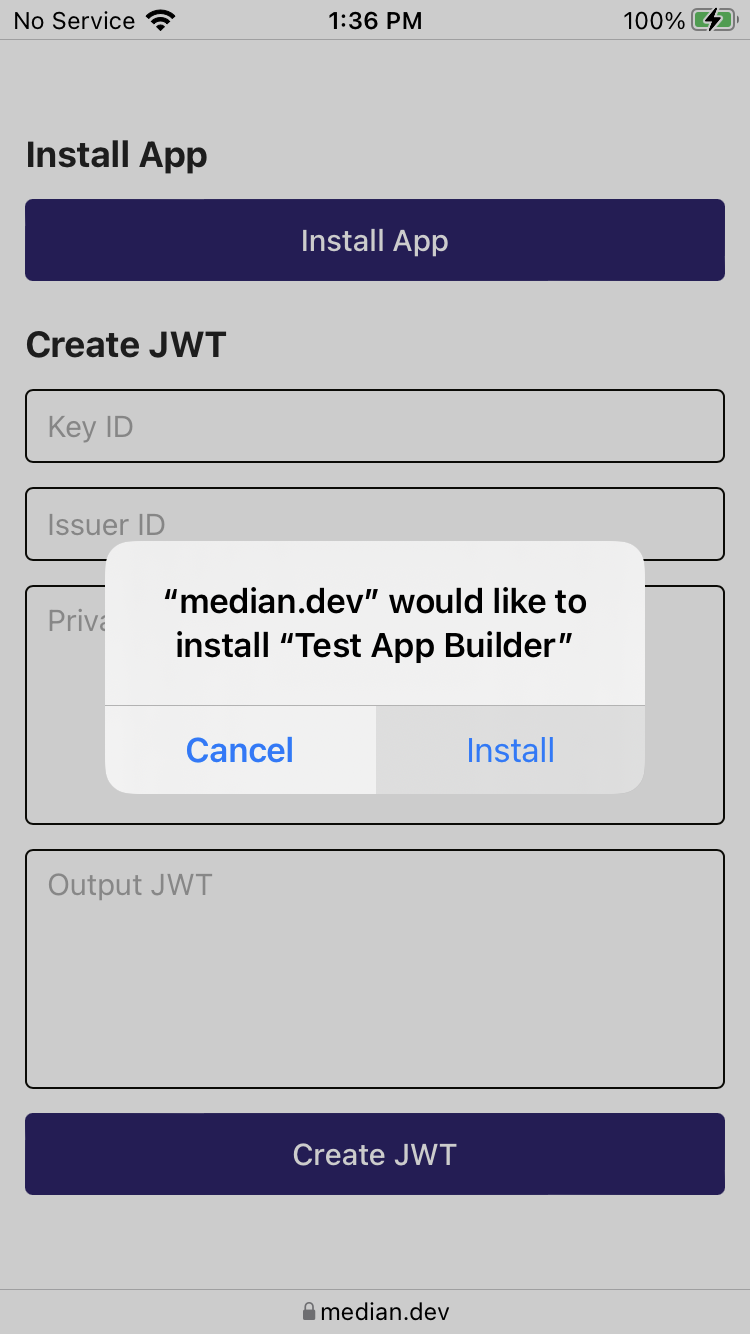
4. Install via browser: When the user taps the “Install App” link in Safari (only supported by Safari), they will be prompted to install the app directly onto their device.
Source: Median.co
Pros of an OTA installation using a manifest file:
OTA (over-the-air) installation — no macOS, USB cable, or Xcode needed.
Great for distributing test builds to multiple testers or for enterprise internal apps.
Cons of an OTA installation using a manifest file:
Requires hosting on a secure (HTTPS) server.
Method 3: Using the Apple Configurator
Who is this for?
This is useful for team members who have a macOS device but do not use Xcode, or IT teams and administrators who need to manage multiple iOS devices within an organization.
How it works:
1. Install Apple Configurator: If not already available, install Apple Configurator directly from the Apple App Store on macOS: some text
2. Save the IPA locally: Save the IPA file so that it is accessible within Finder.
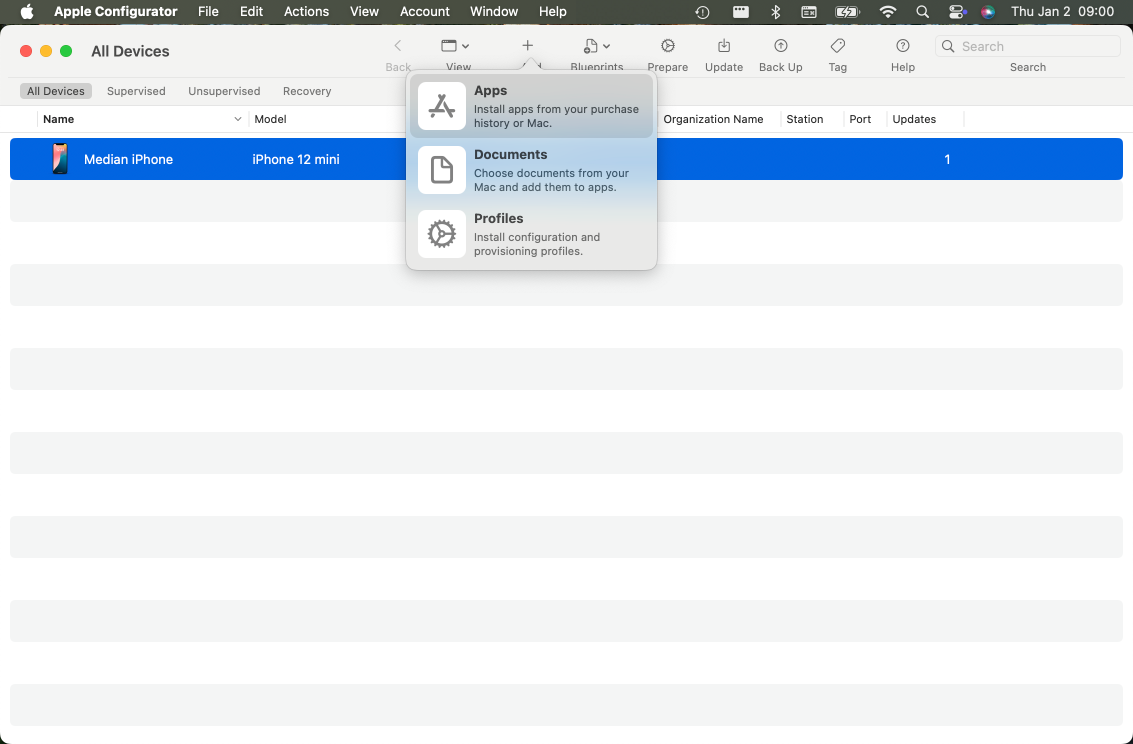
3. Launch Apple Configurator: Connect the device via USB, open Apple Configurator, select Add > Apps.
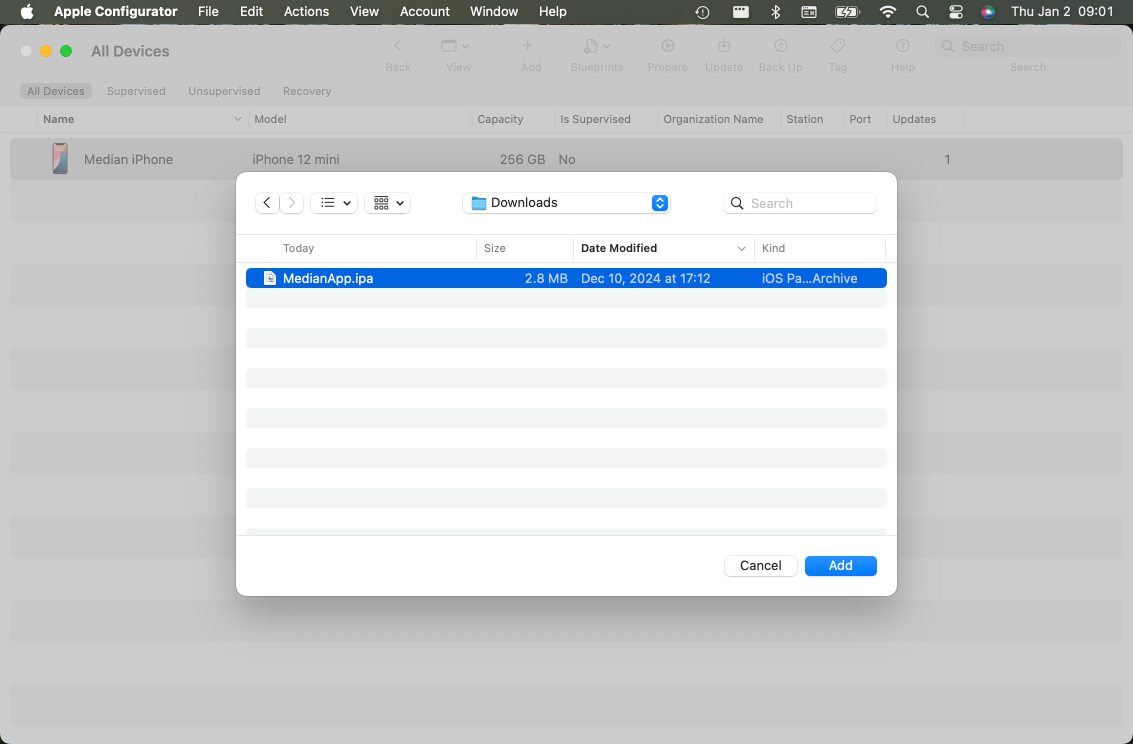
4. Choose your IPA file, and it will install onto the device.
Pros of using the Apple Configurator:
No need for Xcode or hosting the IPA file on a server.
Additional options within Apple Configurator to use “Blueprints” to deploy IPAs and configure multiple devices at once.
Cons of using the Apple Configurator:
Requires a Mac and the Apple Configurator tool.
Not as simple for individual developers or testers who want a quick install.
Key takeaways and best practices: Installing an IPA on iOS devices
Check account eligibility: Ensure you know what type of Apple Developer account you have. An Individual or Organization account has restrictions, such as needing to specify device UDIDs for ad hoc builds. Enterprise accounts allow more freedom, but are only for internal distribution.
Proper code signing is essential: No matter which method you choose, your IPA must include the correct provisioning profile and be properly signed with valid certificates.
Instant app store facelift. No designer required.
Unlock Median’s 500+ free Figma app store screenshot templates designed to meet iOS and Android guidelines. Your app will look its best across platforms, resulting in more downloads and a more powerful app store presence.
Summary
Installing an IPA file onto an iOS device can be achieved by dragging and dropping in Xcode, hosting on a web server with a manifest.plist file for over-the-air installation, or using Apple Configurator. The approach you take will depend on your resources, your user audience, and your Apple Developer account type.
By understanding these methods and their prerequisites, you’ll be well-prepared to distribute and test IPA files outside of the TestFlight/App Store pipeline.
Frequently asked questions
How to install IPA on iPhones?
To install an IPA file on your iPhone, you first need to register your device’s UDID with a developer account or a trusted third-party service. After registration, download the provisioning profile and install it by tapping "Install Profile" in your device settings. Then, use a compatible tool or app, such as AltStore or a third-party sideloading service, to install the IPA. Remember to trust the developer profile in Settings > General > Device Management before launching the app.
Why do I need to get UDID before installing an IPA on my iOS device?
Apple only allows IPA files to be installed on registered devices. To register yours, you need to get your iPhone’s UDID. Without it, the IPA won’t run—even for test builds of native apps or webview apps.
Can I install an IPA for a webview app the same way as a native app?
Yes. Whether it's a webview app or a full native app, IPA installation requires the same steps including UDID registration and signing the build. The process doesn’t change based on how the app is built.
What’s the difference between installing an IPA for a native app vs a webview app?
Technically, there's no difference in the IPA installation process. But native apps often use more system-level features, which may require additional permissions during install. Webview apps are simpler but still require you to get UDID before testing on a device.
Can I install the IPA over the air (OTA)?
Yes you can. After hosting the IPA and a manifest.plist on a secure server and referencing them via an ITMS link, you can tap a link in Safari to install the app. This method supports ad hoc builds.
Do I need Xcode to install an ad hoc IPA?
Not exactly. You can still install via Xcode drag-and-drop, Apple Configurator, or OTA hosting. Xcode is just a common tool used to install ad hoc IPA.
What common errors happen with ad hoc installs?
If your device isn’t in the provisioning profile or you didn't sign the IPA correctly, the install will fail with trust/verification errors. Make sure your device’s UDIDs, profiles, and certificates match.

to top